
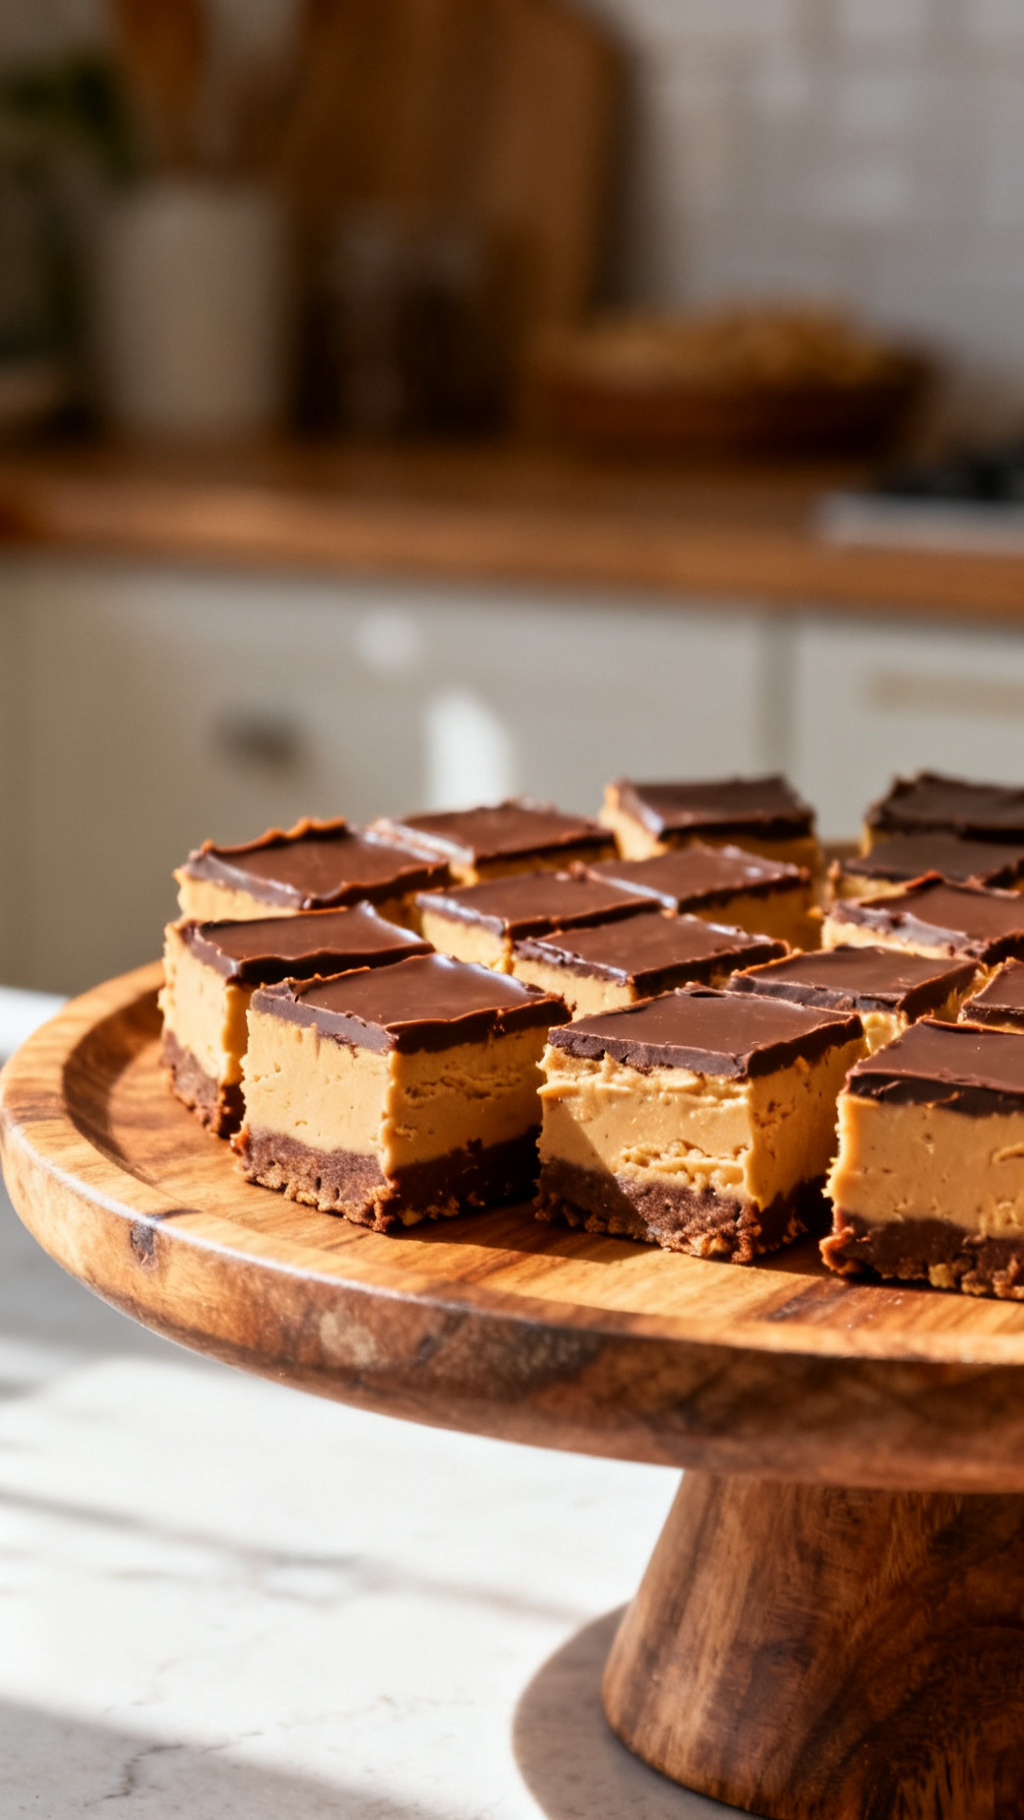
Peanut Butter Chocolate Fudge – The No-Bake Treat That Worths Making
I’ve made this Peanut Butter Chocolate Fudge more times than I can count, perfecting the blend of creamy peanut butter and rich chocolate without any baking. After years of experimenting, I finally nailed a no-bake fudge that’s incredibly simple yet irresistibly delicious.
Peanut Butter Chocolate Fudge – The No-Bake Treat That Worths Making

Ingredients
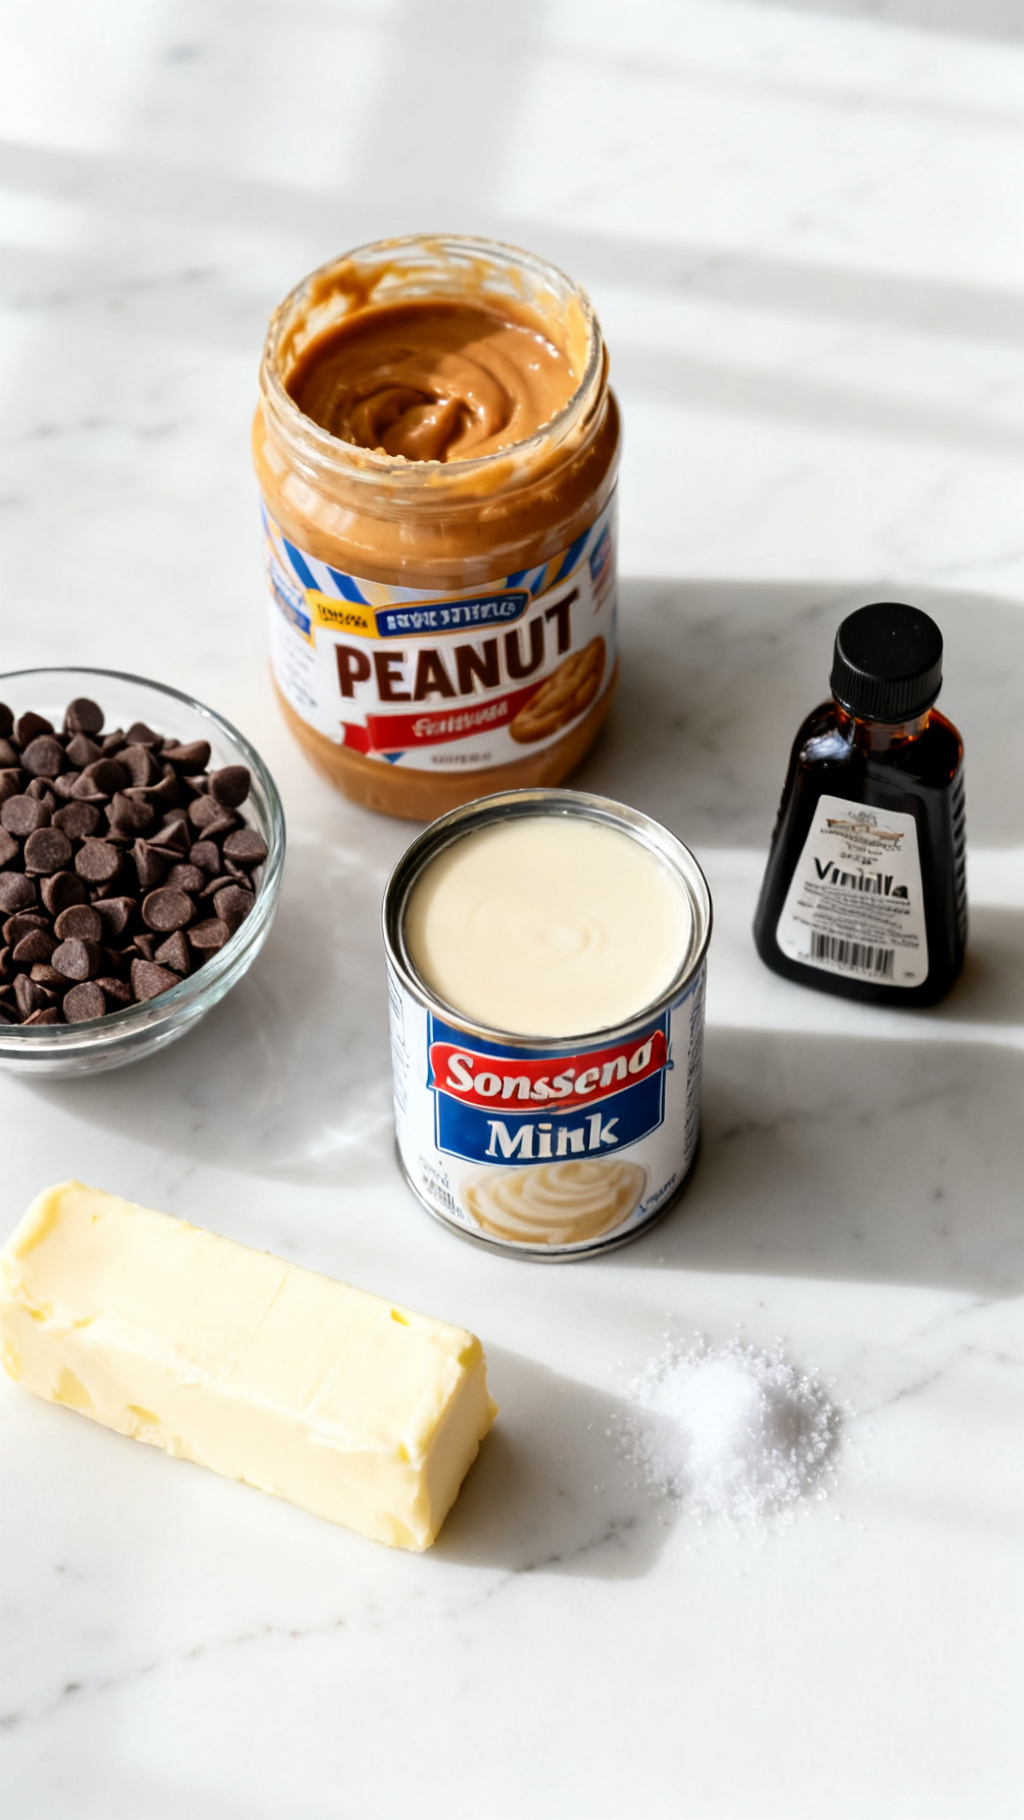
- 1 cup smooth peanut butter
- 2 cups semi-sweet chocolate chips
- 1/2 cup sweetened condensed milk
- 1/4 cup unsalted butter
- 1 teaspoon vanilla extract
- Pinch of salt
Instructions
- Line an 8×8 inch pan with parchment paper, letting the edges hang over for easy removal — I always do this for mess-free cleanup
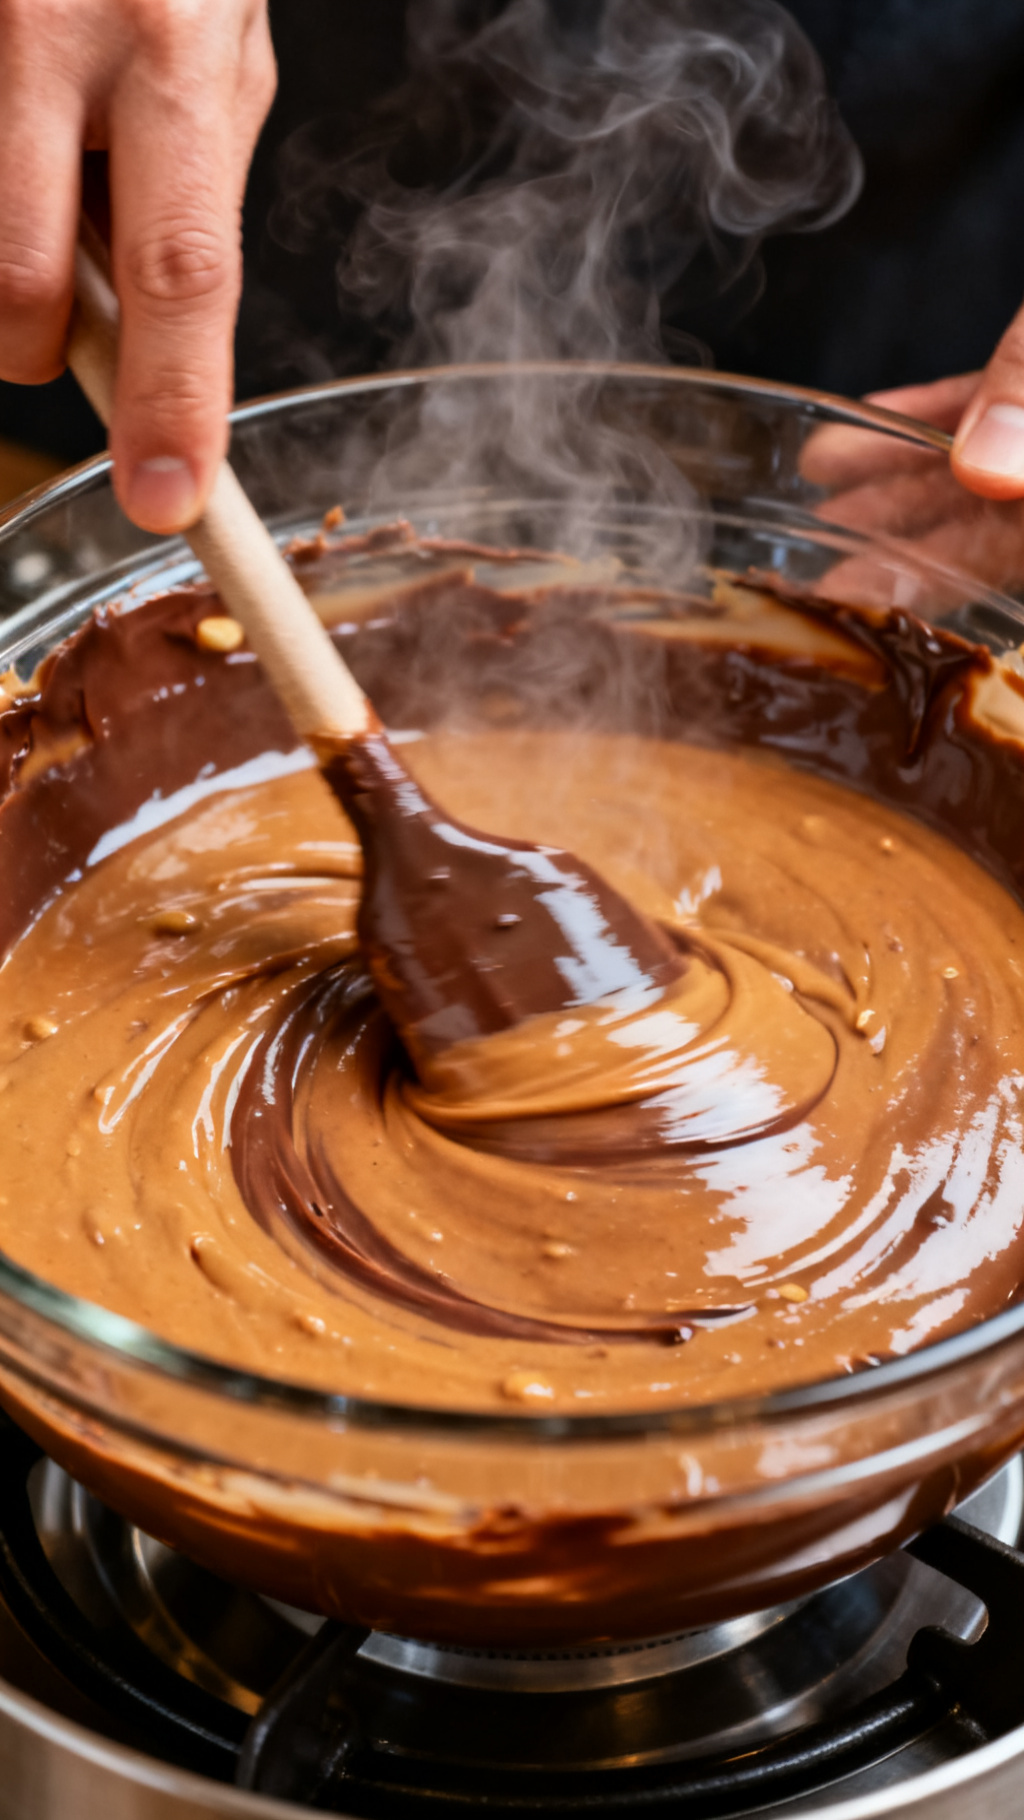
- In a microwave-safe bowl, combine peanut butter, chocolate chips, butter, and sweetened condensed milk
- Microwave the mixture in 30-second intervals, stirring well after each, until completely smooth — I never rush this step to avoid burning the chocolate
Key Takeaways
- Use smooth peanut butter for a silky texture
- Melt chocolate gently to avoid burning
- Chill fudge thoroughly for clean slicing
- Line the pan with parchment for easy removal
Why This Recipe Works
I always recommend combining high-quality peanut butter with premium chocolate to get the best flavor impact. The no-bake method preserves the creamy, soft texture that traditional baking can dry out. I’ve found balancing peanut butter and chocolate perfectly is key to avoid overpowering one flavor.
Pro Tip: Use a double boiler or microwave in short bursts to melt chocolate gently
What Makes It Special
I’ve noticed that this peanut butter chocolate fudge has the ideal creamy-yet-firm consistency most people crave in fudge. It’s also incredibly quick to make, requiring no oven time or complicated steps. This simplicity keeps it versatile for any occasion.
Fact: Fudge was originally developed in the late 19th century as a soft sugar candy
My Secret Technique
I always stir the melted ingredients gently but thoroughly to avoid incorporating air, which helps the fudge hold a smooth texture when set. I also always chill it overnight to let it firm up completely before slicing.
Insight: I find chilling fudge longer makes slicing easier and tidier every time
Ingredients
- 1 cup smooth peanut butter
- 2 cups semi-sweet chocolate chips
- 1/2 cup sweetened condensed milk
- 1/4 cup unsalted butter
- 1 teaspoon vanilla extract
- Pinch of salt
Instructions
- Line an 8×8 inch pan with parchment paper, letting the edges hang over for easy removal — I always do this for mess-free cleanup
- In a microwave-safe bowl, combine peanut butter, chocolate chips, butter, and sweetened condensed milk
- Microwave the mixture in 30-second intervals, stirring well after each, until completely smooth — I never rush this step to avoid burning the chocolate
- Stir in vanilla extract and a pinch of salt to enhance the flavor
- Pour the mixture evenly into the prepared pan and smooth the top with a spatula
- Cover and refrigerate for at least 4 hours or overnight until fully set
- Lift the fudge out using the parchment edges and cut into 16 squares — chilling overnight helps me get clean, neat cuts
Ingredient Alternatives & Substitutions
- Replace smooth peanut butter with almond butter for a nutty twist — I’ve tried this and it adds a unique flavor
- Use dark chocolate chips instead of semi-sweet for a richer taste, which I enjoy personally
- Swap unsalted butter with coconut oil to make it dairy-free — I tested this version and it works well
- Substitute sweetened condensed milk with evaporated milk plus sugar for a less sweet option — I recommend adjusting sweetness to taste
- Add a sprinkle of crushed sea salt on top before chilling to enhance flavors — I always do this for a salty-sweet contrast
Storage Instructions
- Store fudge in an airtight container in the refrigerator for up to 2 weeks
- Wrap individual squares in wax paper to prevent sticking if stacking
- Freeze fudge in a sealed container for up to 3 months and thaw in the fridge before serving
- Keep fudge chilled until just before serving to maintain texture and prevent melting
Common Mistakes to Avoid
- Overheating chocolate: I learned this the hard way by rushing the melting and ending up with grainy fudge
- Not lining the pan: Removing fudge becomes a sticky mess without parchment in my experience
- Skipping the chilling time: I found fudge that isn’t fully chilled is too soft to cut cleanly
- Using chunky peanut butter: I once used crunchy peanut butter and it affected the smooth texture I prefer
- Stirring in vanilla too early: Adding vanilla during melting can cause it to evaporate, so I add it after melting now
- Not measuring ingredients accurately: I had fudge too sweet or too oily before getting precise with amounts
Frequently Asked Questions
Q: Can I use natural peanut butter instead of smooth?
Ans: I’ve tried natural peanut butter, but because it separates quickly, it can make the fudge oily and less firm. I recommend smooth peanut butter for the best texture.
Q: How do I prevent my fudge from becoming grainy?
Ans: In my experience, melting the chocolate gently and stirring thoroughly but gently is key to avoid graininess. I always melt in short bursts and stir carefully to keep it silky.
Q: Can I add nuts or other mix-ins?
Ans: Absolutely! I often fold in chopped roasted peanuts or even a handful of mini chocolate chips after melting for extra texture and flavor.
Conclusion
I’m confident this Peanut Butter Chocolate Fudge will become a favorite go-to treat because it’s so easy and always satisfying. I encourage you to give it a try—you’ll love how smooth, rich, and indulgent this no-bake recipe turns out. Trust me, it’s definitely worth making!